今天来介绍一下如何使用Mocha + Chai + Sinon测试基于Redux + React的web应用,以及介绍一些在使用过程中遇到的问题和解决方法。
Mocha Mocha 是一个JS的测试框架,类似于Java中的Junit、Python中的nose。Mocha的使用非常简单,使用describe和it就可以写单元测试,下面是代码示例。
1
2
3
4
5
6
7
8
9
10
import {expect} from 'chai' ;describe ('Array' , function ( describe ('#indexOf()' , function ( it ('should return -1 when the value is not present' , function ( expect ([1 ,2 ,3 ].indexOf (5 )).to .be .equal (-1 ); expect ([1 ,2 ,3 ].indexOf (0 )).to .be .equal (-1 ); }); }); });
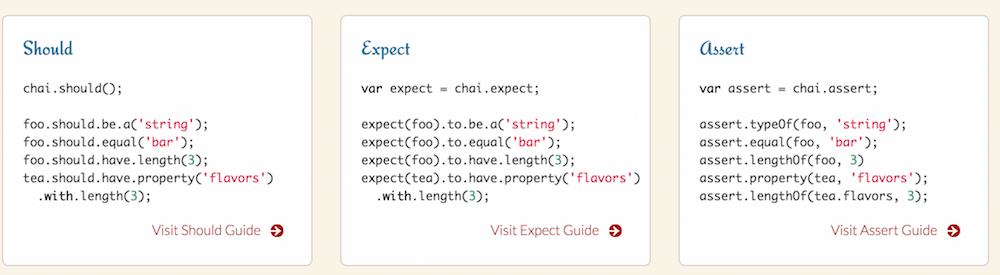
Chai Chai 是一个单元测试的验证框架,它有3种不同形式的校验:expect、should和assert。expect和should的方式让写出来的测试代码更像自然语言,让业务人员也可以看懂,而assert方式是传统单元测试断言的方式,如果以前习惯写Java的单元测试会对这种方式比较熟悉。
Sinon Sinon 是一个mock框架,类似Java的mockito。它可以对任何对象进行mock,更重要的是它提供了一些对mock对象的校验方法。
1 2 3 4 5 6 7 8 9 10 11 12 13 14 const callback = sinon.spy ();const proxy = once (callback);assert (callback.called );assert (callback.calledOnce );assert.equals (callback.callCount , 1 ); assert (callback.calledOn (obj)); assert (callback.calledWith (1 , 2 , 3 ));
Redux + React React不用介绍了,今年最火的一个前端框架,而Redux 是一个传递、处理state数据的JS框架,配合React可以很方便的处理staet数据,从而达到通过state控制渲染页面的目的。作者Dan Abramov自己拍了一个Redux的教学视频,里面通过一个个demo演示了如何写react和redux,视频可以见这里 。
对于Redux和React的应用,最主要的代码有3个部分,分别是actions,reducers,components。actions是发送一个状态到reducers,reducers根据状态返回修改后的state,components接收到state后刷新页面,所以我们的测试主要针对这3个部分。
actons测试 action的代码可能是这样的,接收从component传过来的一个参数,返回一个带有type属性的一个对象。
1
2
3
export function addTodo (text ) { return {type : ADD_TODO , text}; }
actions的测试比较简单,就是返回一个对象,测试代码可以这样写:
1
2
3
4
5
6
7
8
9
10
11
import {expect} from 'chai' ;import * as actions from 'actions/todos' ;describe ('todo actions' , () => { it ('add todo should create ADD_TODO action' , () => { expect (actions.addTodo ('Use Redux' )).to .deep .equal ({ type : 'add_todo' , text : 'Use Redux' , }); }); });
这里使用了chai的expect校验方式,传入一个字符串,验证是否返回正确的对象,这里使用了to.deep.equal这个校验方法,可以校验对象的属性是否相等,而对于number、bool等基本类型的校验可以使用to.be.equal这个校验方法。
reducers测试 reducers代码如下,在原来的state基础上加上一个新的todo对象。
1
2
3
4
5
6
7
8
9
10
11
12
13
export default function todos (state = initState, action ) { switch (action.type ) { case ADD_TODO : return [ ...state, { text : action.text , completed : false , id : new Date ().getTime (), }, ]; } }
测试代码可以这样写:
1
2
3
4
5
6
7
8
9
10
describe ('reducers' , () => { describe ('todos' , () => { it ('should add todo correctly' , () => { const state = todos ({}, {type : ADD_TODO , text : 'foo' }); expect (state.length ).to .be .equal (1 ); expect (state[0 ].text ).to .be .equal ('foo' ); expect (state[0 ].completed ).to .be .equal (false ); }); }); });
测试时传入一个空的state对象和一个action对象,验证返回的state是否增加了一个todo对象。
components测试 components的测试比较复杂,除了测试render后的页面,还需要测试一些component的DOM方法,比如click,change,doubleclick等。下面是一个Header组件,它有h1和另外一个自定义组件TodoInput,其中还有一个handleSave的自定义方法,所以我们要测试的就主要是render和这个方法。
1
2
3
4
5
6
7
8
9
10
11
12
13
14
15
16
17
18
19
20
21
import React , { PropTypes , Component } from 'react' ;import TodoInput from './TodoInput' ;class Header extends Component { handleSave (text ) { if (text && text.length !== 0 ) { this .props .actions .addTodo (text); } } render ( return ( <header className ="header" > <h1 > Todo List</h1 > <TodoInput newTodo placeholder ="请录入..." onSave ={(text) => this.handleSave(text)}/> </header > ); } } Header .propTypes = { actions : PropTypes .object .isRequired , }; export default Header ;
测试React的component,需要用到react的一个测试组件Test Utils ,在写测试代码之前,需要先构造组件render的页面,渲染页面的props参数和render页面的对象,这些在后面的测试中非常有用。
1
2
3
4
5
6
7
8
9
10
11
12
13
14
import sinon from 'sinon' ;import {expect} from 'chai' ;import React from 'react' ;import TestUtils from 'react-addons-test-utils' ;import Header from 'components/Header' ;import TodoInput from 'components/TodoInput' ;function setup ( const actions = {addTodo : sinon.spy ()}; const props = {actions : actions}; const renderer = TestUtils .createRenderer (); renderer.render (<Header {...props } /> const output = renderer.getRenderOutput (); return {props, output, renderer}; }
构造完这些对象后,我们先对render方法进行测试。
1
2
3
4
5
6
7
8
9
10
11
12
13
14
15
16
17
describe ('Header' , () => { it ('should render correctly' , () => { const { output } = setup (); expect (output.type ).to .be .equal ('header' ); expect (output.props .className ).to .be .equal ('header' ); const [ h1, input ] = output.props .children ; expect (h1.type ).to .be .equal ('h1' ); expect (h1.props .children ).to .be .equal ('Todo List' ); expect (input.type ).to .be .equal (TodoInput ); expect (input.props .newTodo ).to .be .equal (true ); expect (input.props .placeholder ).to .be .equal ('请录入...' ); }); });
首先测试component的第一层——header,验证其type和className,然后通过children获取其下层组件h1和TodoInput,再对这2个组件进行校验。
接着测试TodoInput的onSave方法,它实际调用的是handleSave方法,方法会判断参数text的长度是否为0来决定是否调用actions的addTodo方法。
1
2
3
4
5
6
7
8
it ('should call addTodo if length of text is greater than 0' , () => { const { output, props } = setup (); const input = output.props .children [1 ]; input.props .onSave ('' ); expect (props.actions .addTodo .callCount ).to .be .equal (0 ); input.props .onSave ('Use Redux' ); expect (props.actions .addTodo .callCount ).to .be .equal (1 ); });
这里使用sinon把action的addTodo方法mock掉了,然后再验证该方法是否有调用。
React组件使用了CSS文件 在写React的components时可能会加上自己定义的一些css文件(或者是less和sass等),这在mocha运行测试时会报错,报无法解析css语法的错误。我们可以通过编写自定义的mocha css编译器来解决这个问题。
css-null-compiler.js 1 2 3 4 5 6 7 8 9 function noop ( return null ; } require .extensions ['.styl' ] = noop;require .extensions ['.scss' ] = noop;require .extensions ['.css' ] = noop;
然后在运行mocha时加上刚写的编译器:mocha /your/test.spec.js --compilers css:css-null-compiler.js。
webpack使用了alias 在使用webpack时我们会通过别名(alias)的方法来简化我们import其他文件时的路径,比如原来import时需要这样写:
css-null-compiler.js 1 import Header from '../../src/components/Header' ;
使用了alias之后可以这样:
css-null-compiler.js 1 import Header from 'src/components/Header' ;
但是这种路径在测试的时候就会报找不到文件路径的错误,因为直接使用Mocha运行测试时并没有设置路径别名。
因此我们需要使用几个工具来解决这个问题,分别是mock-require 和proxyquire 。
首先在mocha的before方法中通过mock-require来替换别名路径,然后在mocha的beforeEach中用proxyquire来调用被测试的module,具体代码如下:
css-null-compiler.js 1 2 3 4 5 6 7 8 9 10 11 12 13 14 15 16 17 18 19 20 import proxyquire from 'proxyquire' ;import mockrequire from 'mock-require' ;before (() => { mockrequire ('actions/youractions' , 'your/actual/action/path/from/your/test/file' ); mockrequire ('actions/youractions' , {actionMethod : () => {...})); let app;beforeEach (() => { app = proxyquire ('./app' , {}); }); describe ('xxx' , () => { it ('xxxx' , () => { ... }); });
React的组件中使用了DOM变量 在做components测试时还会遇到一个问题,比如在某些组件中使用了DOM的一些全局变量,比如window,document等,这些只有在浏览器中才会有,而mocha测试我们是在命令行中执行的,并没有浏览器的这些变量。
要解决这个问题有2种方法,一种是使用Karma 来做单元测试。Karma是一个测试运行器,它会启动一个浏览器来运行测试,比较适合端到端的页面测试。但单元测试要使用浏览器来运行就显得有点浪费了,而且会影响测试的速度。
所以我们使用第二种方法,使用jsdom 来模拟DOM结构,首先我们要创建一个js文件来模拟DOM。
dom.js 1 2 3 4 5 6 7 8 9 10 11 12 13 14 15 16 17 18 19 20 21 22 23 24 25 26 27 28 import jsdom from 'jsdom' ;import mockrequire from 'mock-require' ;const doc = jsdom.jsdom ('<!doctype html><html><body></body></html>' );const win = doc.defaultView ;global .document = doc;global .window = win;function propagateToGlobal (window for (const key in window ) { if (!window .hasOwnProperty (key)) continue ; if (key in global ) continue ; global [key] = window [key]; } window .matchMedia = window .matchMedia || function matchMedia ( return { matches : false , addListener : () => {}, removeListener : () => {}, }; }; } propagateToGlobal (win);
然后在mocha.opts文件中加入对这个文件的引用,mocha.opts文件是mocha的配置文件,一般放在test目录下面,通过配置该文件可以在调用mocha命令时少写一些参数。
dom.js 1 2 3 --require test/dom.js --reporter dot --ui bdd
这样以后在运行mocha时就会自动加载dom.js文件了。