ChatGLM3-6B 功能原理解析

Published on:
Tags:

上次我们介绍了 ChatGLM3-6B 的部署,虽然我们的大语言模型(LLM)部署起来了,新功能也试用了,但问题很多的小明就要问了,这其中的实现原理是什么呢?到底是怎么实现的呢?那今天我们就再来介绍 ChatGLM3-6B 具体的功能原理,包括工具调用、代码解释器等。

添加自定义工具

在官方文档中,我们可以看到添加工具的说明:

可以通过在 tool_registry.py 中注册新的工具来增强模型的能力。只需要使用 @register_tool 装饰函数即可完成注册。对于工具声明,函数名称即为工具的名称,函数 docstring 即为工具的说明;对于工具的参数,使用 Annotated[typ: type, description: str, required: bool] 标注参数的类型、描述和是否必须。

我们来尝试添加一个上网查询工具,这里我们使用SerpApi来实现,SerpApi 是一个网络搜索 API,可以通过 API 来实现各种网络搜索,包括谷歌、百度、必应等。使用 SerpApi 首先需要在其官网注册一个账号,然后在个人设置中获取 API Key,这个 API Key 用于使用 SerpAPI 进行网络查询,再安装 SerpApi 的 python 库:pip install google-search-results,然后就可以编写工具代码了。

我们在tool_registry.py中添加一个web_search工具:

1
2
3
4
5
6
7
8
9
10
11
12
13
14
15
16
17
18
19
20
21
22
23
24
25
@register_tool
def web_search(
query: Annotated[str, 'The query text to be queried', True],
) -> str:
"""
Search the result for input `query` from web
"""
from serpapi import GoogleSearch

search = GoogleSearch({
"q": query,
"gl": "cn",
"location": "China",
"output": "json",
"api_key": "your serpapi api key"
})

try:
query_result = search.get_dict()
result = process_response(query_result)
return result
except:
import traceback
ret = "Error encountered while searching!\n" + traceback.format_exc()

在代码中,我们使用@register_tool标签注册工具,工具方法参数使用Anotated进行标注,然后再调用 SerpApi 的方法进行网络查询,其中的process_response方法是对查询结果进行解析,获取第一条查询结果提取内容并返回,具体实现可以参考 LangChain 的这个方法源码

添加完代码后,我们重启下 WebUI 服务,试用下新增的工具,查看运行结果:

使用 API 接口进行工具调用

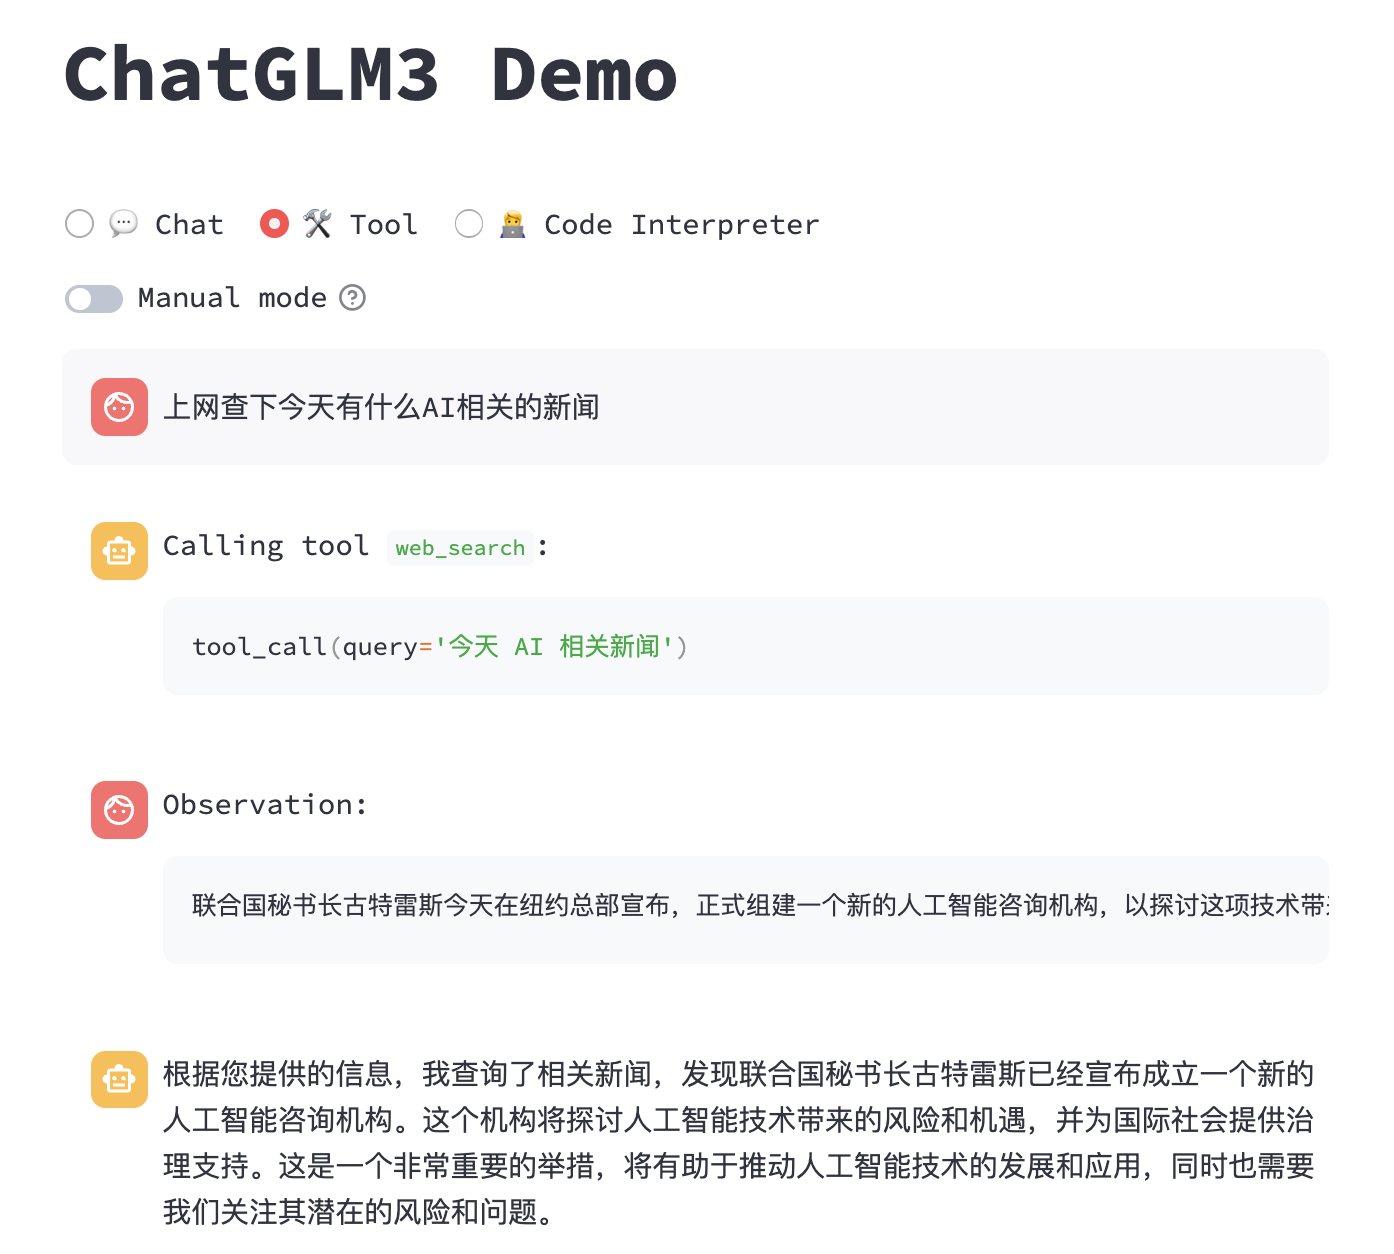
我们再来看如何在 API 接口中使用工具调用,在 API 请求参数messages的每个元素中,除了rolecontent外,还新增metadatatools参数,metadata是具体工具名称,tools是可以用到的所有工具列表,其实 ChatGLM3 是参考了 ChatGPT 的Function Calling功能,这 2 个参数分别对应 Function Calling 的function_callfunctions

在初始请求中,我们需要传递tools参数,来告诉 LLM 有哪些工具可以使用,tools参数中每个元素有以下几个属性:

  • name:工具名称
  • description:工具描述
  • parameters:工具参数,包括参数的类型、参数的描述、是否必需(有 2 种格式,可以参考以下代码)
1
2
3
4
5
6
7
8
9
10
11
12
13
14
15
16
17
18
19
20
21
22
23
24
25
26
27
28
29
30
31
# 格式 1
tools = [
{
"name": "get_weather",
"description": "Get the current weather for `city_name`",
"parameters": [
{
"name": "city_name",
"description": "The name of the city to be queried",
"type": "str",
"required": True
}
]
}
]
# 格式 2
tools = [
{
"name": "get_weather",
"description": "Get the current weather for `city_name`",
"parameters": {
"type": "object",
"properties": {
"city_name": {
"description": "The name of the city to be queried"
}
},
"required": ["city_name"]
}
}
]

然后我们通过 python 代码发起 API 请求调用,这里需要安装一下 OpenAI 的 python 库:pip install openai

1
2
3
4
5
6
7
8
9
10
11
12
13
14
15
16
17
18
19
20
21
22
23
24
25
import openai

# 设置 OpenAI 参数
openai.api_base = "http://localhost:7861/v1"
openai.api_key = "xxx"

system_info = {
"role": "system",
"content": "Answer the following questions as best as you can. You have access to the following tools:",
"tools": tools,
}

messages = [
system_info,
{
"role": "user",
"content": "帮我查询北京的天气怎么样",
}
]
response = openai.ChatCompletion.create(
model="chatglm3",
messages=messages,
temperature=0,
return_function_call=True
)
  • 代码中我们将 OpenAI 的 API 地址换成本地的 ChatGLM3 API 地址,因为是调用本地的 LLM,所以无需填写 OpenAI 的 api_key,这里就随便写个字符串即可
  • 填写 system 角色的提示词信息,需要将 tools 参数加进去
  • 填写 user 角色的信息,这里就正常填写 role 和 content 参数就行
  • 发起 ChatCompletion 请求,这里需要注意的是,需要将 model 设为chatglm3,同时加上 return_function_call 参数,设置为 true,这样才能让 LLM 去调用工具

将用户的初始请求发出去后,我们再来看如何进行工具调用:

1
2
3
4
5
6
7
8
9
10
11
12
13
14
15
16
17
18
19
20
from json
from tool_register import dispatch_tool

function_call = json.loads(response.choices[0].message.content) # 这里返回`get_weather`工具的信息
tool_response = dispatch_tool(function_call["name"], function_call["parameters"])

messages = response.choices[0].history # 获取历史对话信息
messages.append(
{
"role": "observation",
"content": tool_response, # 调用函数返回结果
}
)

response = openai.ChatCompletion.create(
model="chatglm3",
messages=messages,
temperature=0,
)
print(response.choices[0].message.content)
  • LLM 根据用户的问题在工具集合中选择工具,这里选择了get_weather工具
  • 使用dispatch_tool方法执行工具,dispatch_tool方法实现的方式很多,使用函数式编程的方式可以很方便地实现该功能
  • 通过observation角色的对话信息将工具执行结果添加到历史对话中,相当将工具执行结果返回给 LLM
  • 再次发起 ChatCompletion 请求,让 LLM 生成最终答案,最后打印出 LLM 生成的最终结果

这就是使用 API 调用工具的方法,更多细节可以参考官方源码

代码解释器

通过查看代码解释器的示例代码,发现其大概的流程是这样的:用户提出问题 -> LLM 生成代码 -> 提取生成的代码 -> 调用代码执行工具 -> 使用工具(Jupyter)执行代码 -> 提取(Jupyter)执行结果 -> 返回结果给用户。

ChatGLM3 在原有的 3 种角色(systemuserassistant)上增加了另外 3 个角色:observationinterpretertool

1
2
3
4
5
6
7
8
9
10
11
12
# conversation.y
class Role(Enum):
def __str__(self):
match self:
case Role.SYSTEM:
return "<|system|>"
case Role.USER:
return "<|user|>"
case Role.ASSISTANT | Role.TOOL | Role.INTERPRETER:
return "<|assistant|>"
case Role.OBSERVATION:
return "<|observation|>"

tool角色是工具调用,interpreter角色是代码解释器,observation角色是用来观察各种结果,包括 LLM 的输出、工具的返回结果、代码解释器的执行结果等。我们再来看下代码解释器具体的功能是如何实现的:

1
2
3
4
5
6
7
8
9
10
11
12
13
14
15
16
17
18
19
20
21
22
23
24
25
26
27
28
29
30
31
32
33
34
35
case '<|observation|>':
code = extract_code(output_text)
print("Code:", code)

display_text = output_text.split('interpreter')[-1].strip()
append_conversation(Conversation(
Role.INTERPRETER,
postprocess_text(display_text),
), history, markdown_placeholder)
message_placeholder = placeholder.chat_message(name="observation", avatar="user")
markdown_placeholder = message_placeholder.empty()
output_text = ''

with markdown_placeholder:
with st.spinner('Executing code...'):
try:
res_type, res = execute(code, get_kernel())
except Exception as e:
st.error(f'Error when executing code: {e}')
return
print("Received:", res_type, res)

if res_type == 'text' and len(res) > TRUNCATE_LENGTH:
res = res[:TRUNCATE_LENGTH] + ' [TRUNCATED]'

append_conversation(Conversation(
Role.OBSERVATION,
'[Image]' if res_type == 'image' else postprocess_text(res),
tool=None,
image=res if res_type == 'image' else None,
), history, markdown_placeholder)
message_placeholder = placeholder.chat_message(name="assistant", avatar="assistant")
markdown_placeholder = message_placeholder.empty()
output_text = ''
break
  • 从 LLM 的输出中通过extract_code方法提取代码,一般在 markdown 格式的文档中提取
  • 再增加一个interpreter角色的对话记录,将代码显示在页面上
  • 执行代码并获取执行结果,增加一个observation角色的对话记录,将执行结果返回给 LLM,LLM 再根据结果生成最终的答案,并将最终答案显示在页面上

下面是提取代码的功能,通过正则解析将 markdown 中的代码提取出来:

1
2
3
4
def extract_code(text: str) -> str:
pattern = r'```([^\n]*)\n(.*?)```'
matches = re.findall(pattern, text, re.DOTALL)
return matches[-1][1]

更多的细节可以参考官网综合 Demo 的源码,如果在测试过程中遇到问题,也可以根据源码排查原因。

总结

其实 ChatGPT 之前就已经实现了工具调用和代码解释器的功能,但因为它是闭源的,我们无法窥视其中的原理,但 ChatGLM3 在开源产品的基础上实现了这些功能,让我们可以更好地理解其中的原理,也可以根据自己的需求进行二次开发,这也是开源的魅力所在。因研究的时间有限,文中难免有所疏漏,如果文中有不正确的地方,希望在评论区留言讨论。

关注我,一起学习各种人工智能和 AIGC 新技术,欢迎交流,如果你有什么想问想说的,欢迎在评论区留言。

赞赏

Comments