ChatGLM3-6B 部署指南

最近智谱 AI 对底层大模型又进行了一次升级,ChatGLM3-6B 正式发布,不仅在性能测试和各种测评的数据上有显著提升,还新增了一些新功能,包括工具调用、代码解释器等,最重要的一点是还是保持 6B 的这种低参数量,让我们可以在消费级的显卡上部署大语言模型(LLM)。本文将对 ChatGLM3-6B 的部署做一次详细介绍,让更多人可以体验这个 LLM 的有趣功能。
环境安装
首先下载 ChatGLM3 的代码仓库,并安装相关的依赖。
1 | git clone https://github.com/THUDM/ChatGLM3 |
然后下载 ChatGLM3-6B 的模型文件,以下是笔者常用的 HuggingFace 下载方式。
1 | GIT_LFS_SKIP_SMUDGE=1 git clone https://huggingface.co/THUDM/chatglm3-6b |
ChatGLM3-6B 的模型文件在ModelScope上也有提供下载,如果 HuggingFace 无法访问的话,可以从这上面下载。
1 | git lfs install |
部署 WebUI 服务
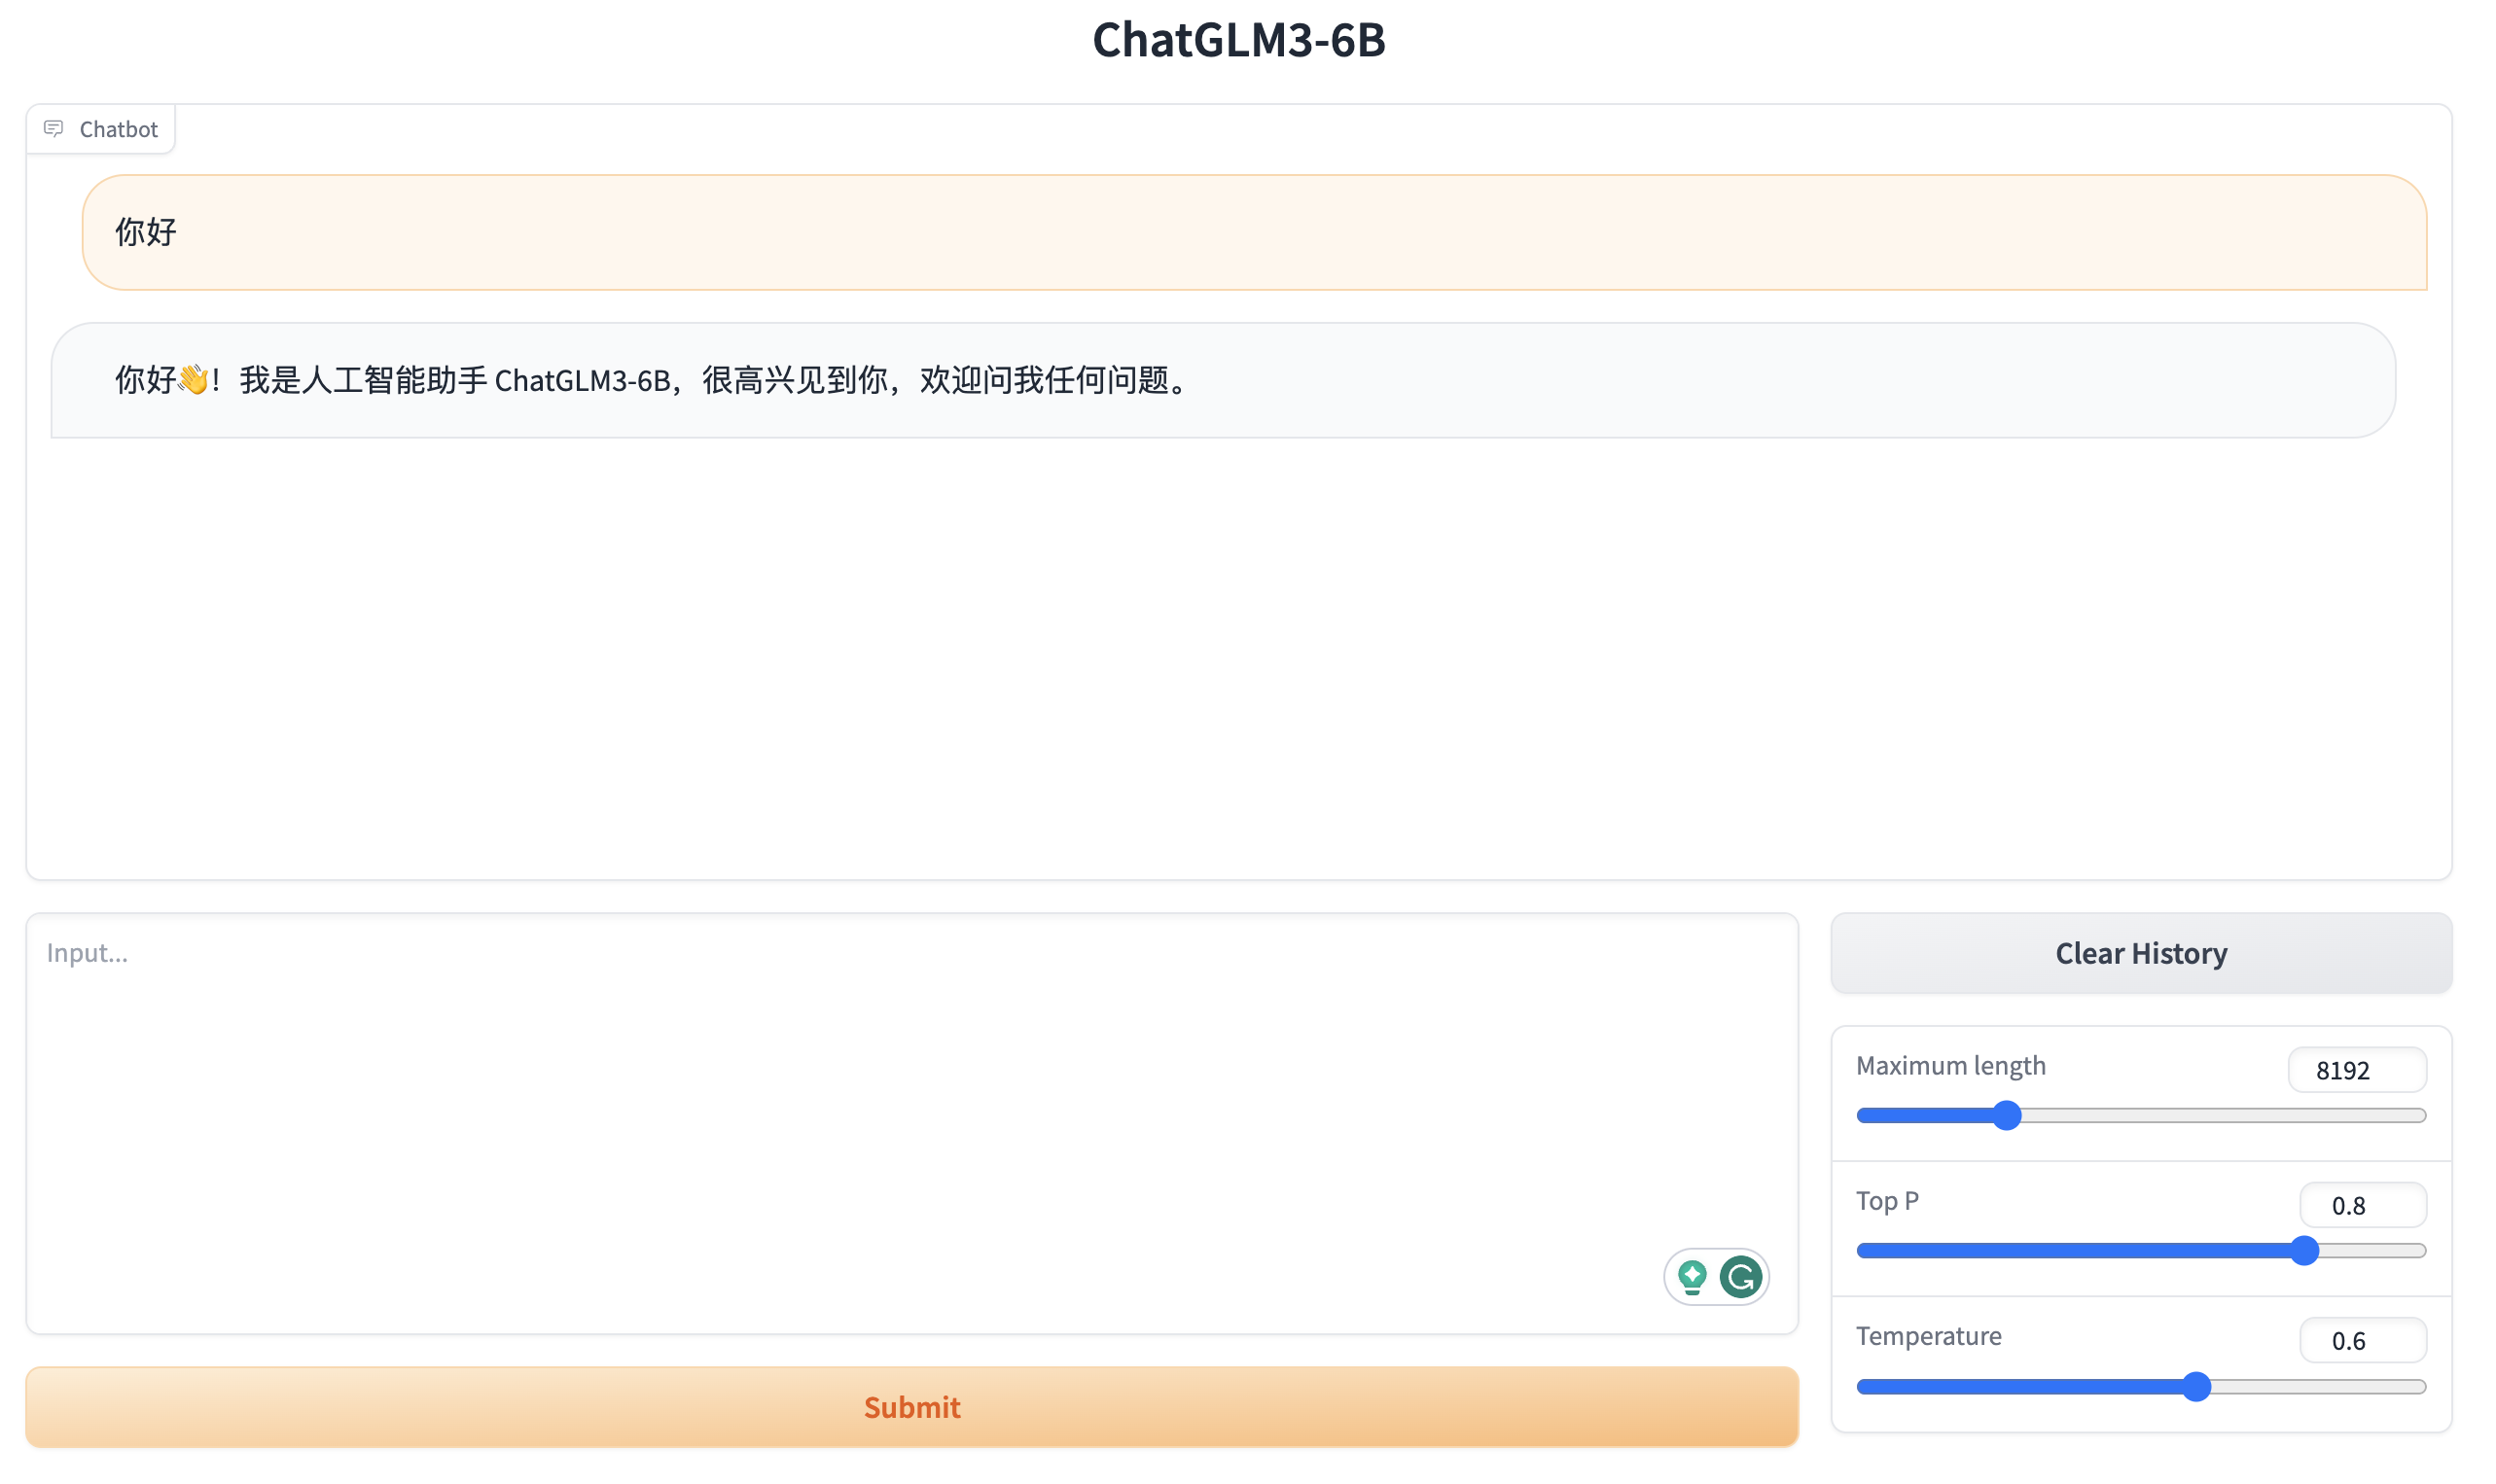
ChatGLM3-6B 提供了两种 WebUI,分别是 Gradio 和 Streamlit。
Graido 服务
在启动 Gradio 服务之前需要先修改web_demo.py文件,将里面的模型地址改成本地的地址:
1 | -tokenizer = AutoTokenizer.from_pretrained("THUDM/chatglm3-6b", trust_remote_code=True) |
然后执行以下命令启动 Gradio 服务,服务启动后在浏览器中可以访问该服务:
1 | python web_demo.py |
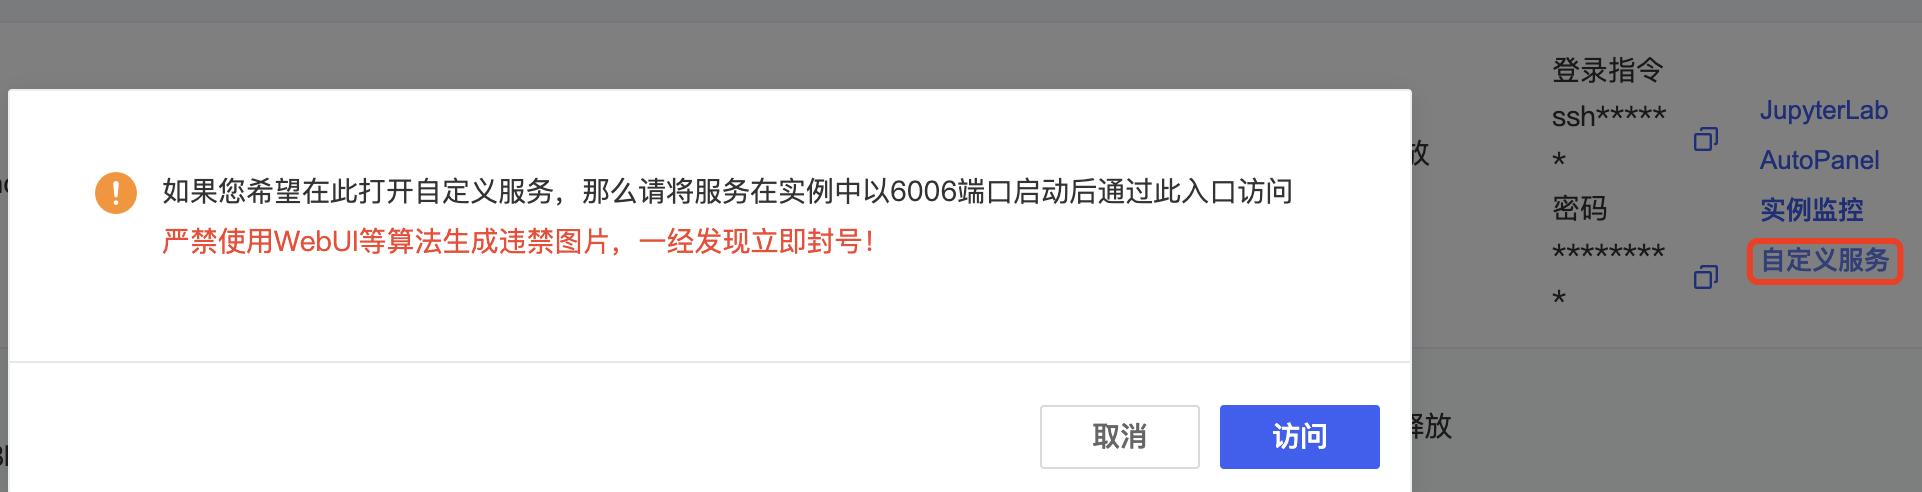
如果是使用 AutoDL 进行部署的话,可以将服务的端口设置6006(AutoDL 的开放端口),然后通过 AutoDL 的自定义服务进行访问。
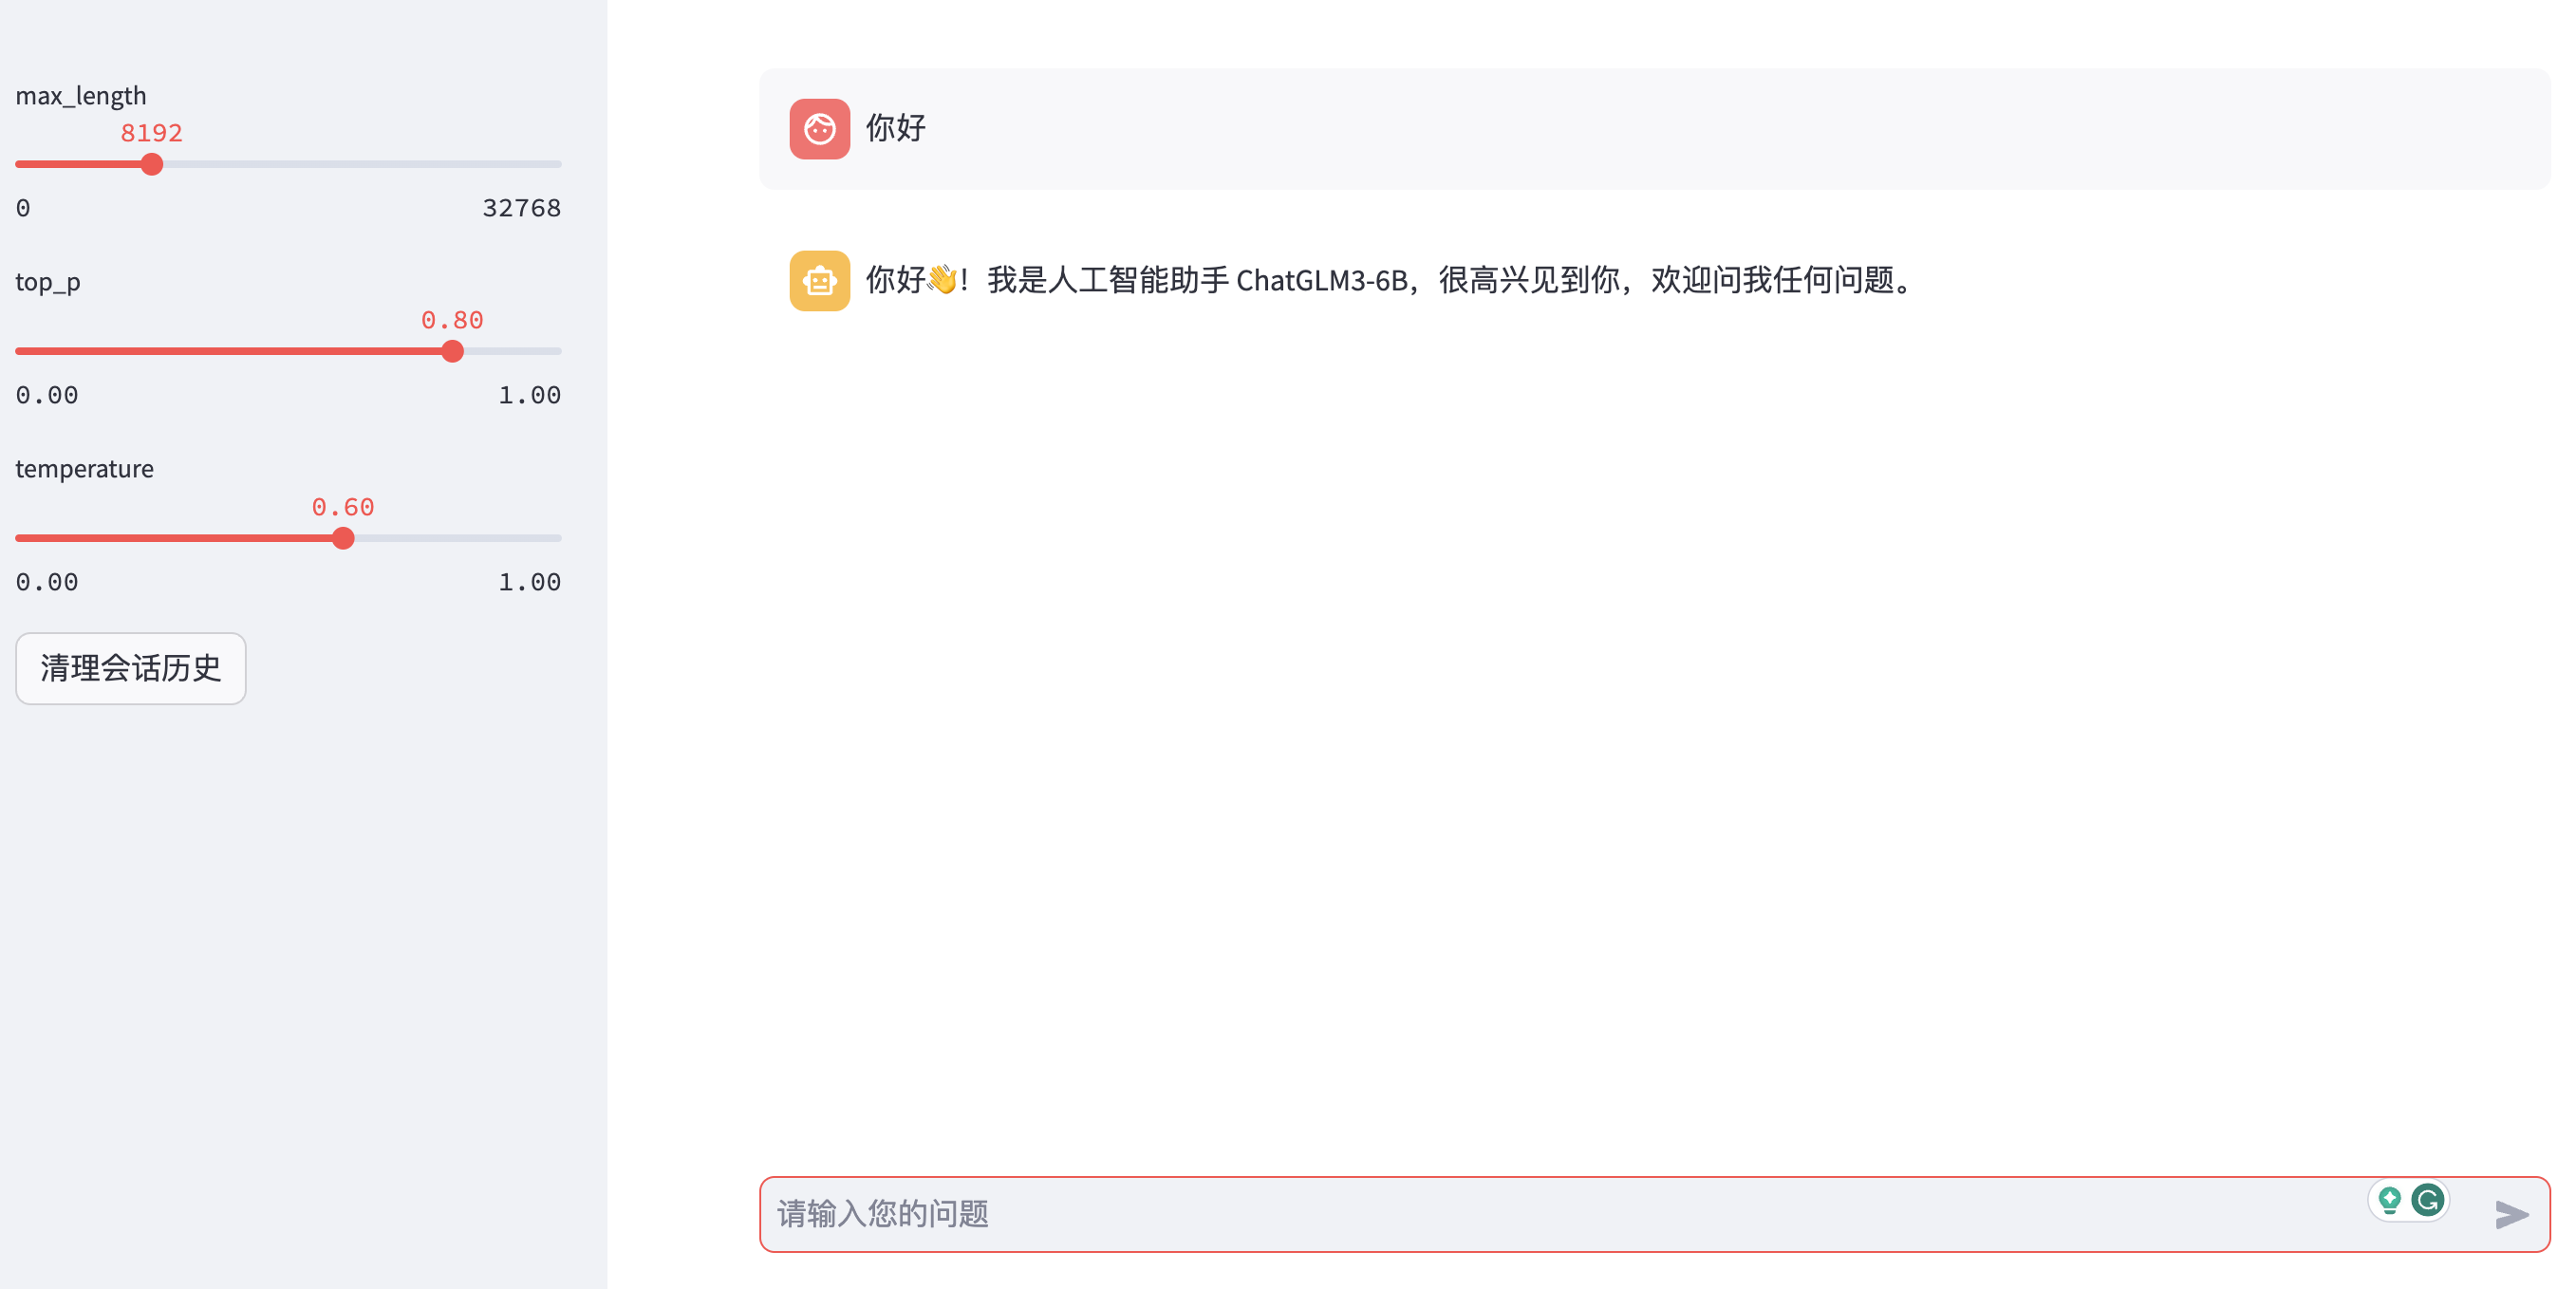
Streamlit 服务
在启动 Streamlit 服务之前需要修改web_demo2.py,将里面的模型地址改成本地的地址:
1 | -model_path = "THUDM/chatglm3-6b" |
然后执行以下命令启动 Streamlit 服务:
1 | streamlit run web_demo2.py |
如果是使用 AutoDL 进行部署的话,即使使用其开放端口(6006)也无法正常访问 Streamlit 的页面,页面会一直停留在Please wait...的提示中。因为 Streamlit 没有像 Gradio 那种内网代理功能,Gradio 在启动服务时可以通过 share=True 参数来生成一个公网链接,这个链接会代理到服务器的内部服务,这样在外部也可以正常访问 Gradio 服务。而 Streamlit 没有这种功能,所以我们需要通过 Ngrok 这个工具来实现内网穿透,将内网的服务代理到公网上,这样就可以正常访问页面了。
Ngrok 安装使用(可选)
首先在 Ngrok 官网上查看安装命令,我们以 Linux 系统为例,有多种方式可以安装,包括压缩包下载、APT 安装、Snap 安装,这里我们使用 APT 安装,执行以下命令:
1 | curl -s https://ngrok-agent.s3.amazonaws.com/ngrok.asc | sudo tee /etc/apt/trusted.gpg.d/ngrok.asc >/dev/null && echo "deb https://ngrok-agent.s3.amazonaws.com buster main" | sudo tee /etc/apt/sources.list.d/ngrok.list && sudo apt update && sudo apt install ngrok |
Ngrok 安装完成后,需要到它的官网上注册一个账号,然后在Your Authtoken菜单中获取 Authtoken,这个 Authtoken 用于验证用户身份,可以通过以下命令将 Authtoken 设置到本地。
1 | $ ngrok config add-authtoken your-ngrok-authtoken # 这里替换成你的 Authtoken |
然后执行以下命令,通过 Ngrok 代理本地的 Streamlit 服务。
1 | ngrok http 8501 # streamlit 默认端口为 8501 |
最后我们通过窗口中的https://e7d9-36-111-143-226.ngrok-free.app地址就可以访问 Streamlit 服务了。
部署 API 服务
启动 API 服务,服务的默认端口是 7861:
1 | python openai_api.py |
该服务是兼容 OpenAI 接口,可以通过调用 OpenAI API 的方式来调用接口,注意要传递model参数,值为gpt-3.5-turbo:
1 | curl -X 'POST' \ |
部署综合 Demo 服务
ChatGLM3-6B 还提供了一个综合的 Demo,包含了对话、工具调用、代码解释器等功能,我们来部署这个 Demo 服务。
首先可以按照官方文档说明新建一个 python 环境,然后安装相关依赖:
1 | cd composite_demo |
安装 Jupyter 内核和设置本地模型路径,然后启动 WebUI 服务:
1 | ipython kernel install --name chatglm3-demo --user |
Demo 里面除了对话功能外,还有工具调用和代码解释器功能,初始工具有两个,一个是天气查询,还有一个是随机数生成:
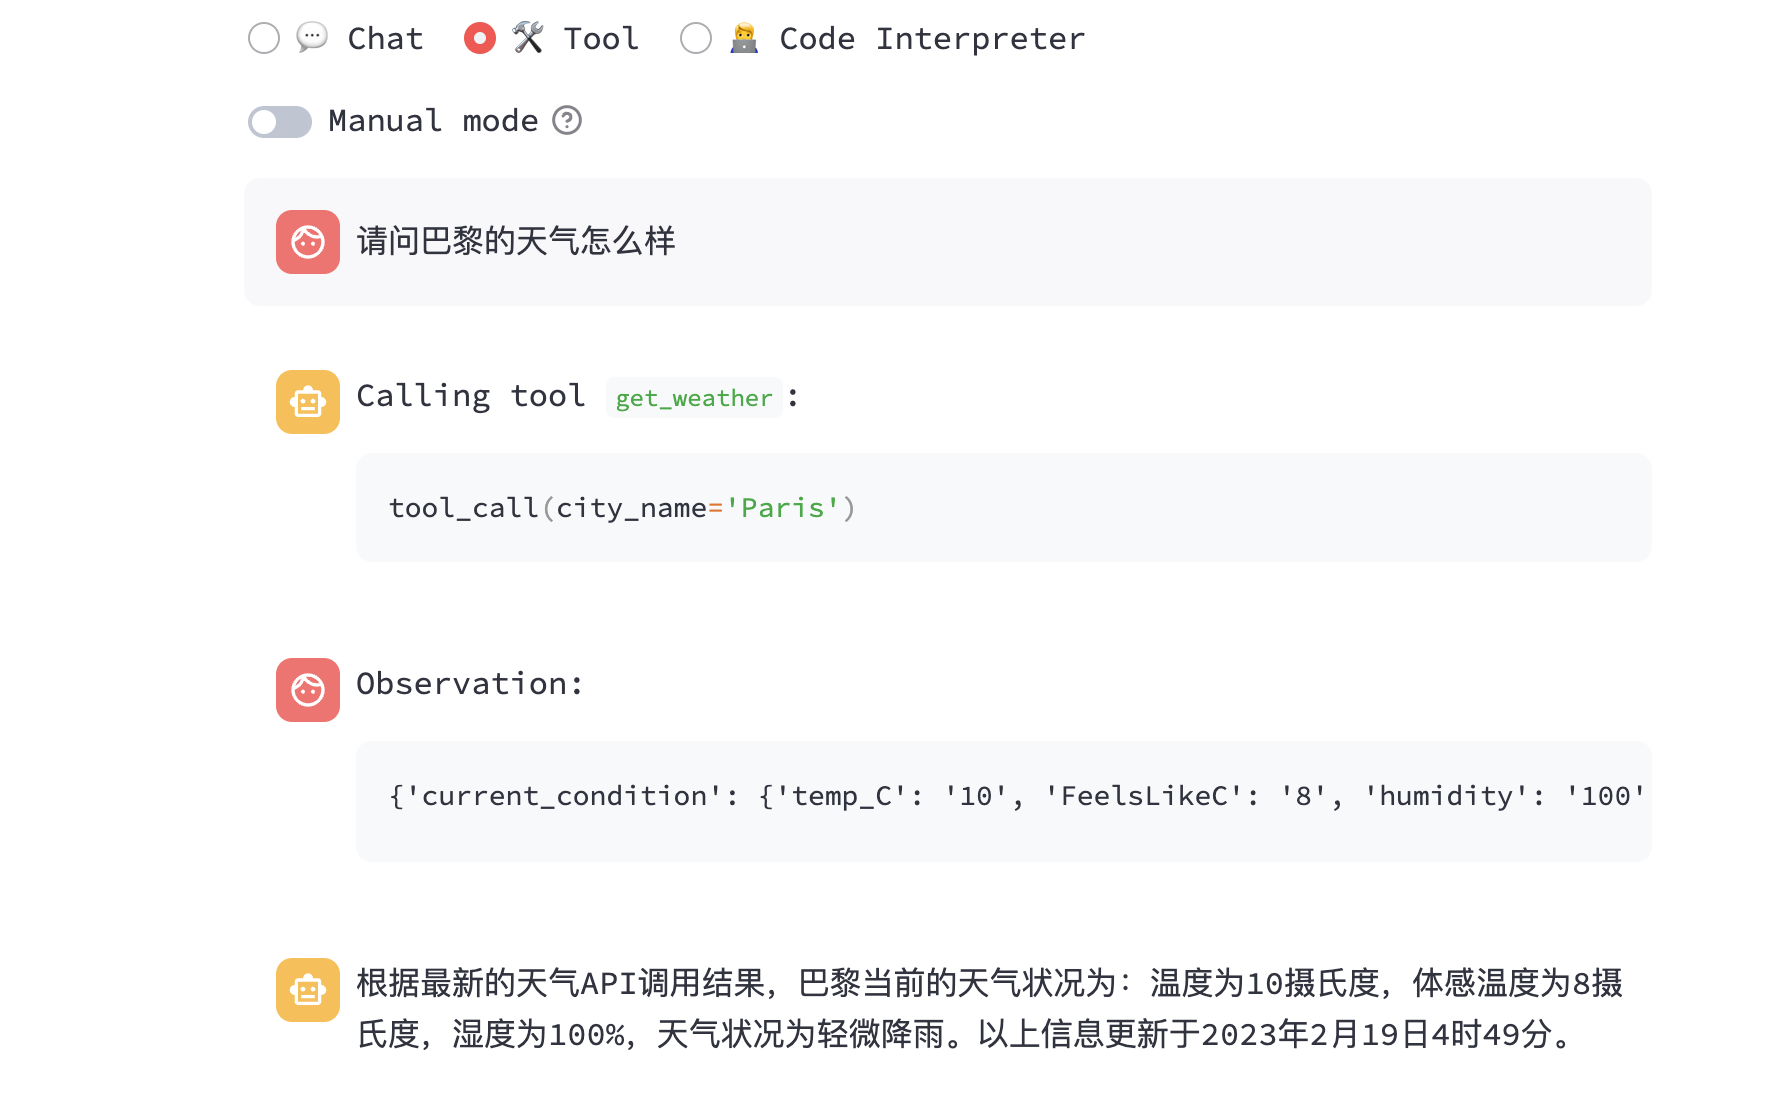
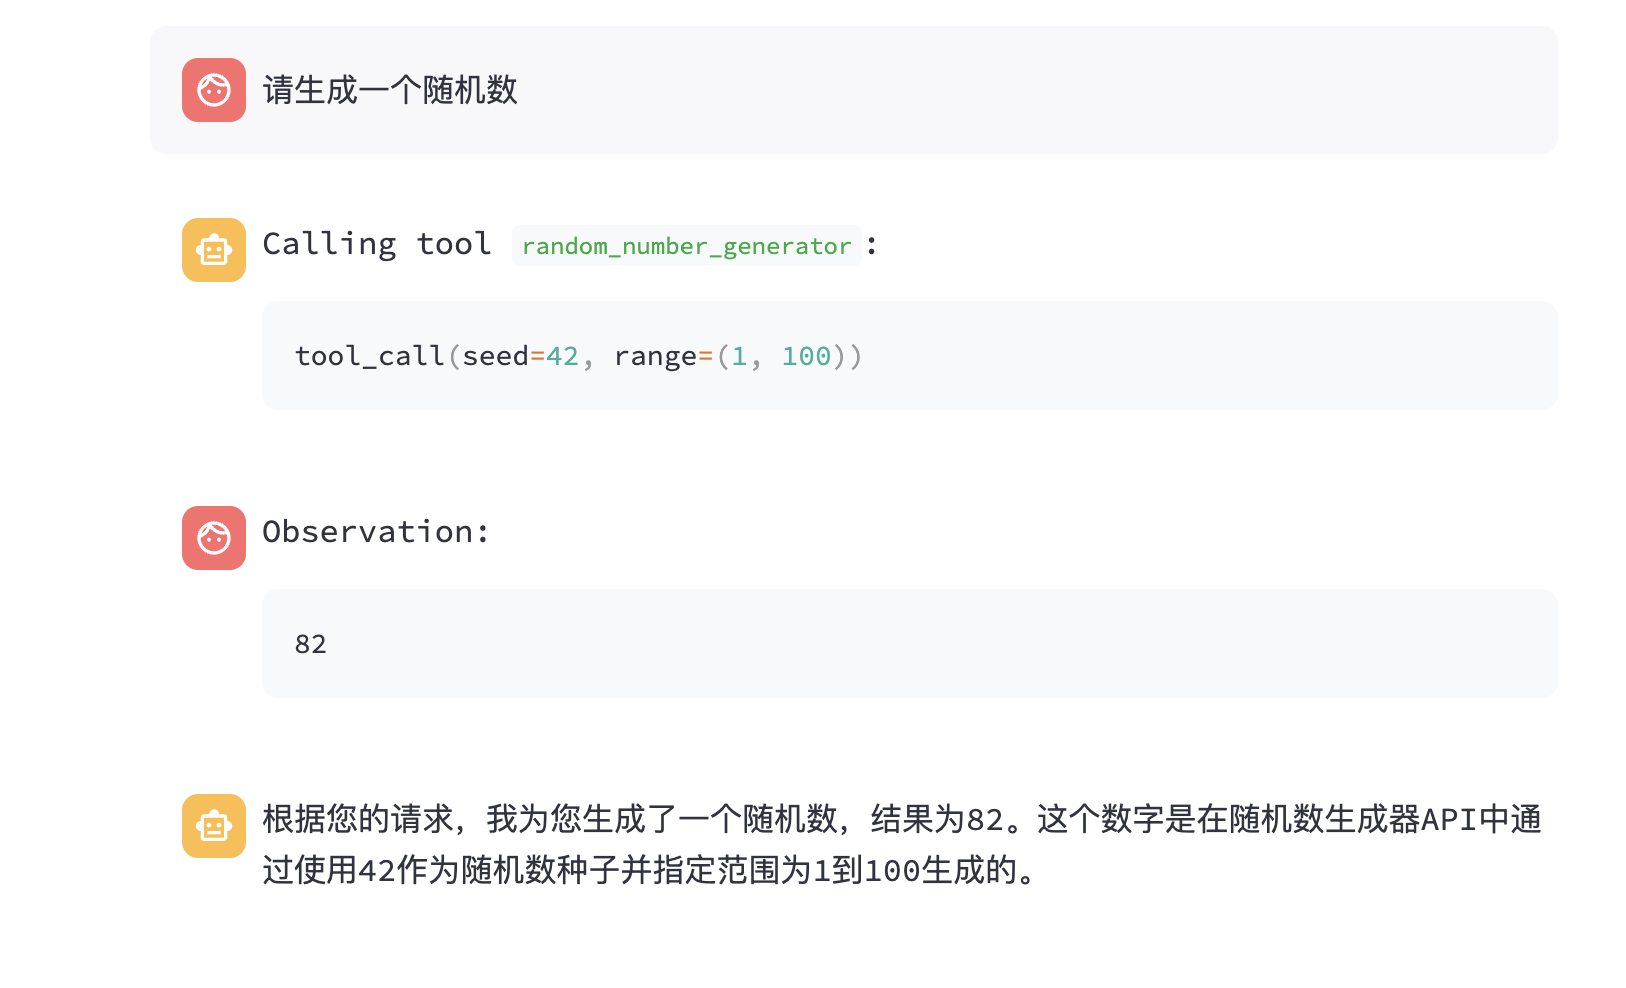
需要注意一点是:ChatGLM3-6B-32K 模型是没有工具调用功能的,只有 ChatGLM-6B 模型才有。
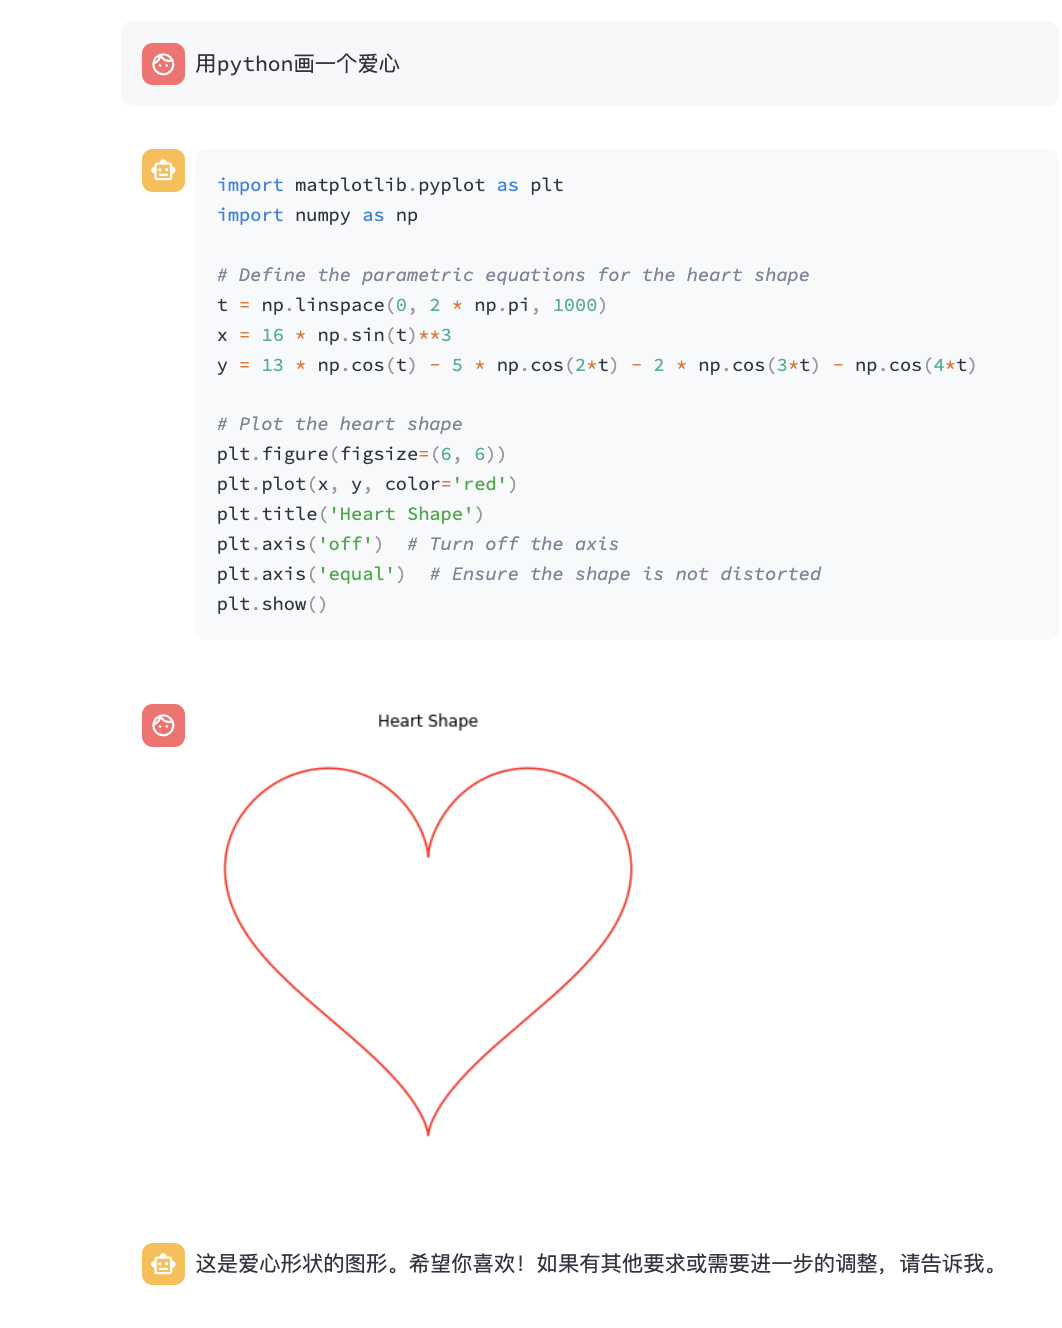
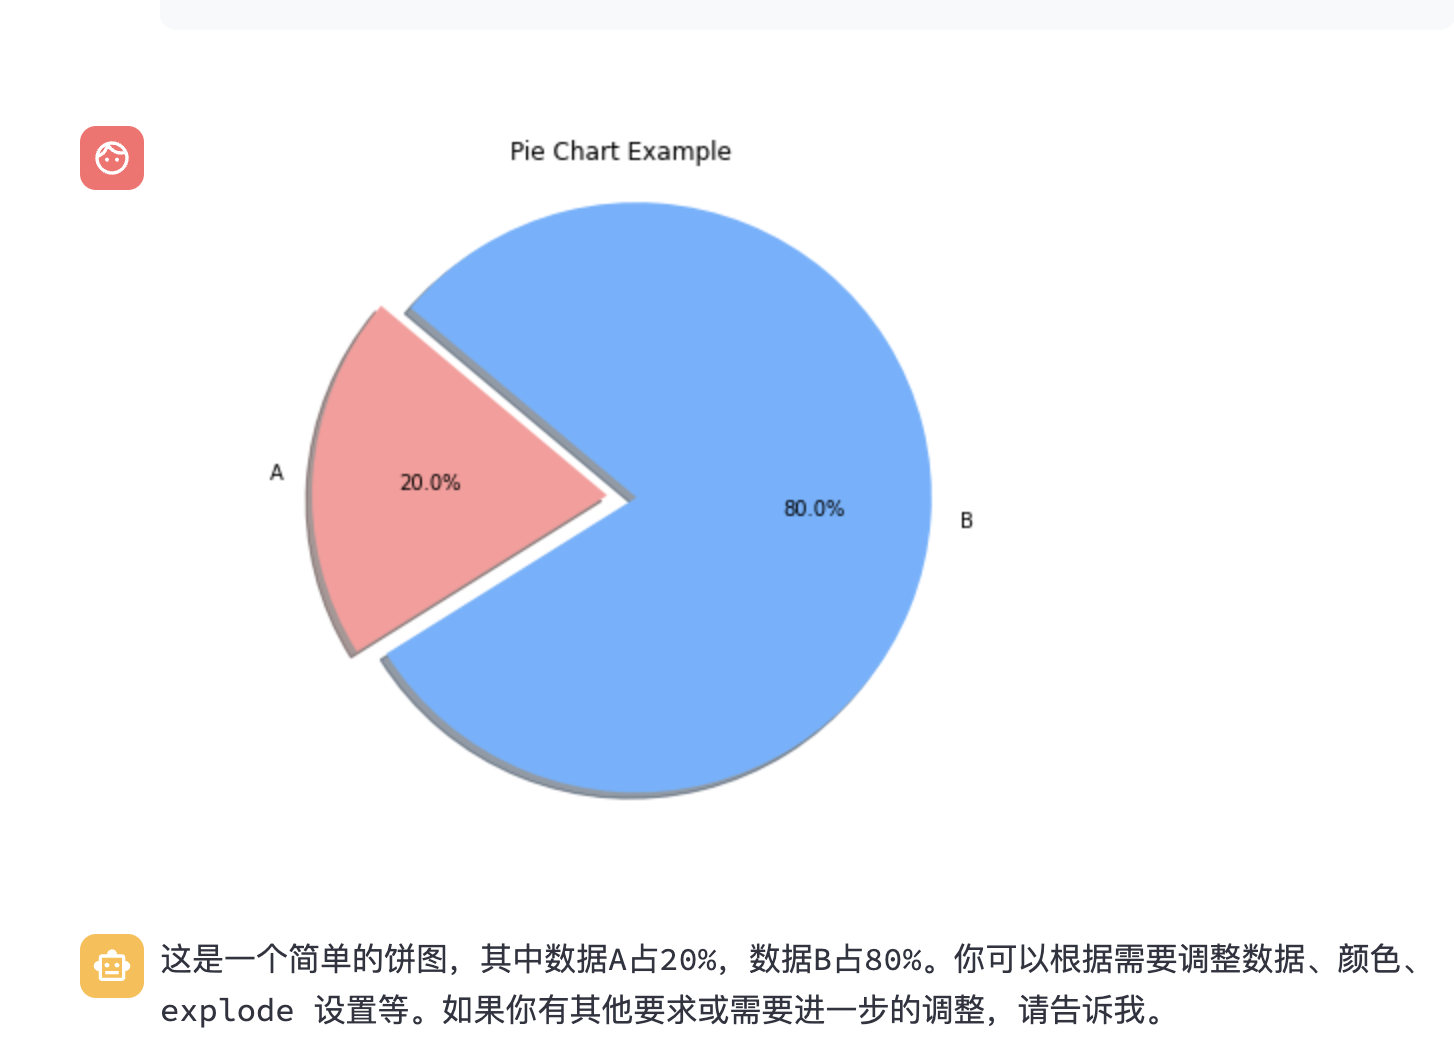
下面是代码解释器功能的截图,可以画爱心,还可以画饼图:
总结
上面介绍的是官方的部署,其实使用 FastChat 来部署更加简单,这种方式可以参考我之前的这篇文章,但是用 FastChat 可能无法使用 ChatGLM3-6B 的工具调用和代码解释器的功能。希望这篇文章能够帮助到大家,如果有什么问题可以在评论区留言。
关注我,一起学习各种人工智能和 AIGC 新技术,欢迎交流,如果你有什么想问想说的,欢迎在评论区留言。